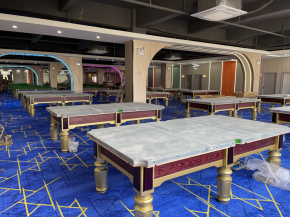
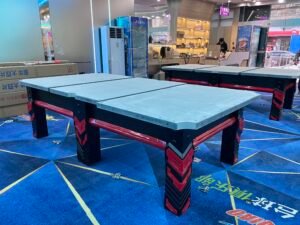
The billiard table is the core equipment of billiard sports, and its assembly process requires rigor and meticulousness. Mastering the correct assembly method can not only ensure the stability and performance of the billiard table but also provide a high-quality experience for subsequent billiard activities. The following will introduce the assembly steps of the billiard table in detail.
## I. Preparation Work
Before starting the assembly, prepare the tools needed for assembly, such as a screwdriver, wrench, level, rubber hammer, etc. At the same time, carefully count each component of the billiard table, including the frame components, slate, billiard cloth, ball pockets, screws, etc., to ensure that all components are complete and undamaged. Select a spacious, flat, and well-lit venue for assembly to avoid affecting the assembly effect due to a narrow space or uneven ground during the assembly process.

## II. Frame Construction
First, install the legs of the billiard table at the four corners of the frame respectively, and use a screwdriver and matching screws to tighten and fix them. Pay attention to ensuring that the table legs are firmly installed and on the same horizontal plane, which can be initially judged by observation or simple measurement. Then, splice the other parts of the frame in sequence, use mortise and tenon joints or connectors for connection, and use a wrench to reinforce the screws to make the frame form a stable overall structure. During the connection process, ensure that the right angles of the frame are accurate and all components are closely fitted to avoid gaps or looseness.
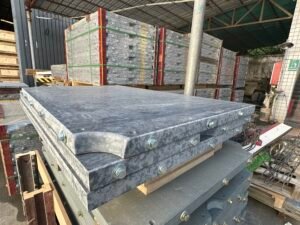
## III. Slate Installation
The slate is a key component of the billiard table, and its installation accuracy directly affects the rolling effect of the billiard balls. Place the slates on the frame one by one, and pay attention to aligning the joints between the slates. Use a level to measure each slate, and adjust the level of the slate by adding or reducing gaskets under the slate to ensure that the flatness error of the entire table surface is within a very small range. After all the slates are adjusted to a horizontal state, use screws to fix the slates on the frame. The tightening force of the screws should be moderate to avoid cracking the slate due to excessive tightness or causing the slate to shift due to looseness.
## IV. Billiard Cloth Laying
Lay the billiard cloth flat on the installed slate, and pay attention to keeping the direction of the fluff of the billiard cloth consistent, usually from the break area to the bottom pocket. Start from one end of the billiard table, use a special billiard cloth tensioner to gradually tighten the billiard cloth, making it fit smoothly on the surface of the slate and avoiding wrinkles or air bubbles. During the process of tightening the billiard cloth, continuously adjust the position of the billiard cloth to ensure that the edge of the billiard cloth is aligned with the frame of the billiard table. After the billiard cloth is fully tightened, use a staple gun to fix the billiard cloth on the edge of the frame. The staples of the staple gun should be evenly distributed, and the depth of insertion should be moderate to prevent the billiard cloth from loosening.
## V. Ball Pocket Installation
Install the ball pockets at the pocket openings of the billiard table according to the corresponding positions, and use screws to fix the ball pockets on the frame. Ensure that the ball pockets are firmly installed and in the correct position, and the openings of the ball pockets should be completely aligned with the pocket openings of the table surface so that the billiard balls can smoothly fall into the ball pockets. After the installation is completed, a simple test can be carried out. Gently put the billiard balls into the pocket openings to check the receiving and ball-falling effects of the ball pockets.
## VI. Detail Adjustment and Inspection
After completing the above steps, conduct a comprehensive inspection of the billiard table. Use a level again to detect the flatness of the table surface and make fine adjustments if necessary. Check whether the connection parts of the frame are firm and whether the screws are tightened; check whether the billiard cloth is flat and whether the edges are well fixed; check whether the ball pockets are firmly installed. After confirming that all components are installed correctly and there are no problems, clean the dust and debris on the surface of the billiard table, and a complete billiard table is assembled.
Through the above detailed assembly steps, you can successfully assemble a billiard table with good performance. During the assembly process, be patient and meticulous, and pay attention to every detail to ensure that the billiard table can perform optimally in subsequent use. If you find the installation process cumbersome and are worried that you cannot install a billiard table with accurate levelness, you can also choose to purchase a Spike billiard table. We have high-quality products and professional services, and we will provide you with one-stop services for billiard room layout design and billiard table installation free of charge. Direct sales from the manufacturer, with strength to prove. Control the quality from the source to provide you with high-quality products. One-stop shopping, convenient and fast, making you satisfied.